Learn how to update a frontend service and connect it to fresh data coming from a new topic.
Welcome to part two of our chat app tutorial using Redpanda and Quix! The first part focused on updating the backend so chat messages are vetted for banned words. However, this change is not yet reflected in the frontend.
So, in this second part, you’ll learn how to update a frontend service and connect it to new data coming from a new topic (the “messages_sanitized” topic you created in part one). Depending on which message broker you selected, that topic is stored in Redpanda Cloud or Quix Cloud (the default). The required frontend updates are the same in both cases.
When you’re done, the frontend should look like this:
As a reminder of what you'll be building, check out the fully functional chat app demo. If you're ready to follow along with us, it helps to start by getting to know SignalR—the technology that any frontend uses to interact with Quix.
SignalR: bringing real-time data to frontend apps
SignalR is an .NET library that enables real-time communication between servers and connected clients. It’s like a Swiss Army knife for real-time interactions because it abstracts away the underlying real-time communication protocols.
From a developer’s perspective, you don’t have to worry about whether WebSockets are supported by the client. SignalR will fall back to other supported protocols transparently. This makes it perfect for user-to-user or group chat applications.
To use SignalR, you normally need to install a SignalR Hub in your backend and connect to it with a SignalR client. However, installing a Hub isn’t necessary in Quix Cloud. A SignalR Hub is already integrated into every project (i.e. workspace), so you just need to handle the client interactions. This chat app demo uses the SignalR TypeScript library to connect to the hub.
Now that we’re all familiar with SignalR. Let’s get into the tutorial.
Step 1: Configuring a bearer token for the frontend
Normally, a frontend would run outside of Quix, since it’s primarily a backend environment. This means the frontend needs a bearer token to authenticate with Quix.
To make this project easier to replicate, we’ve included a frontend service in the project template. However, even though the frontend service is running within the Quix environment, it still needs a bearer token.
The frontend uses SignalR to communicate with Quix via a Websocket API to retrieve and render data from the backend. This API requires a bearer token that is specific to each environment.
For this tutorial, you’ll create a Quix Personal Access Token to use as your bearer token. You’ll then create a secret to store this token in your environment (yes, this is a bit convoluted, but you only have to do it once). Here’s how you do it:
Get a Personal Access Token in Quix
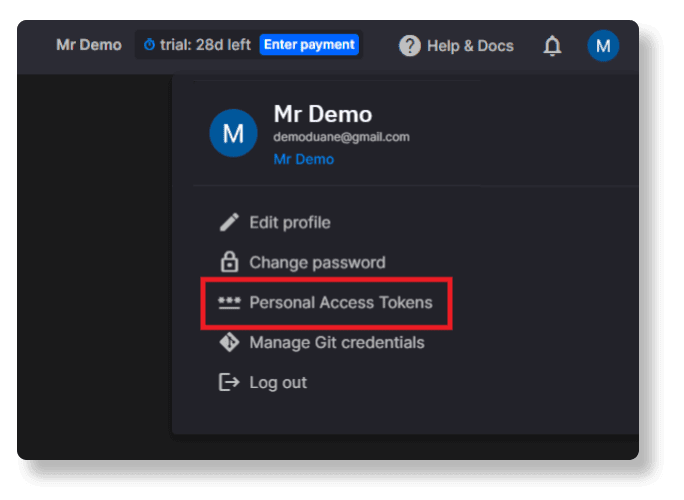
Open your profile menu on the top right, and select Personal Access Tokens.
In the dialog that appears, click Generate token and paste your personal access token in notepad or any other temporary storage location — you’ll need it for the next step.
Add the required secrets
In the Quix portal, open the Applications page and click Sentiment Demo UI to open the Quix IDE.
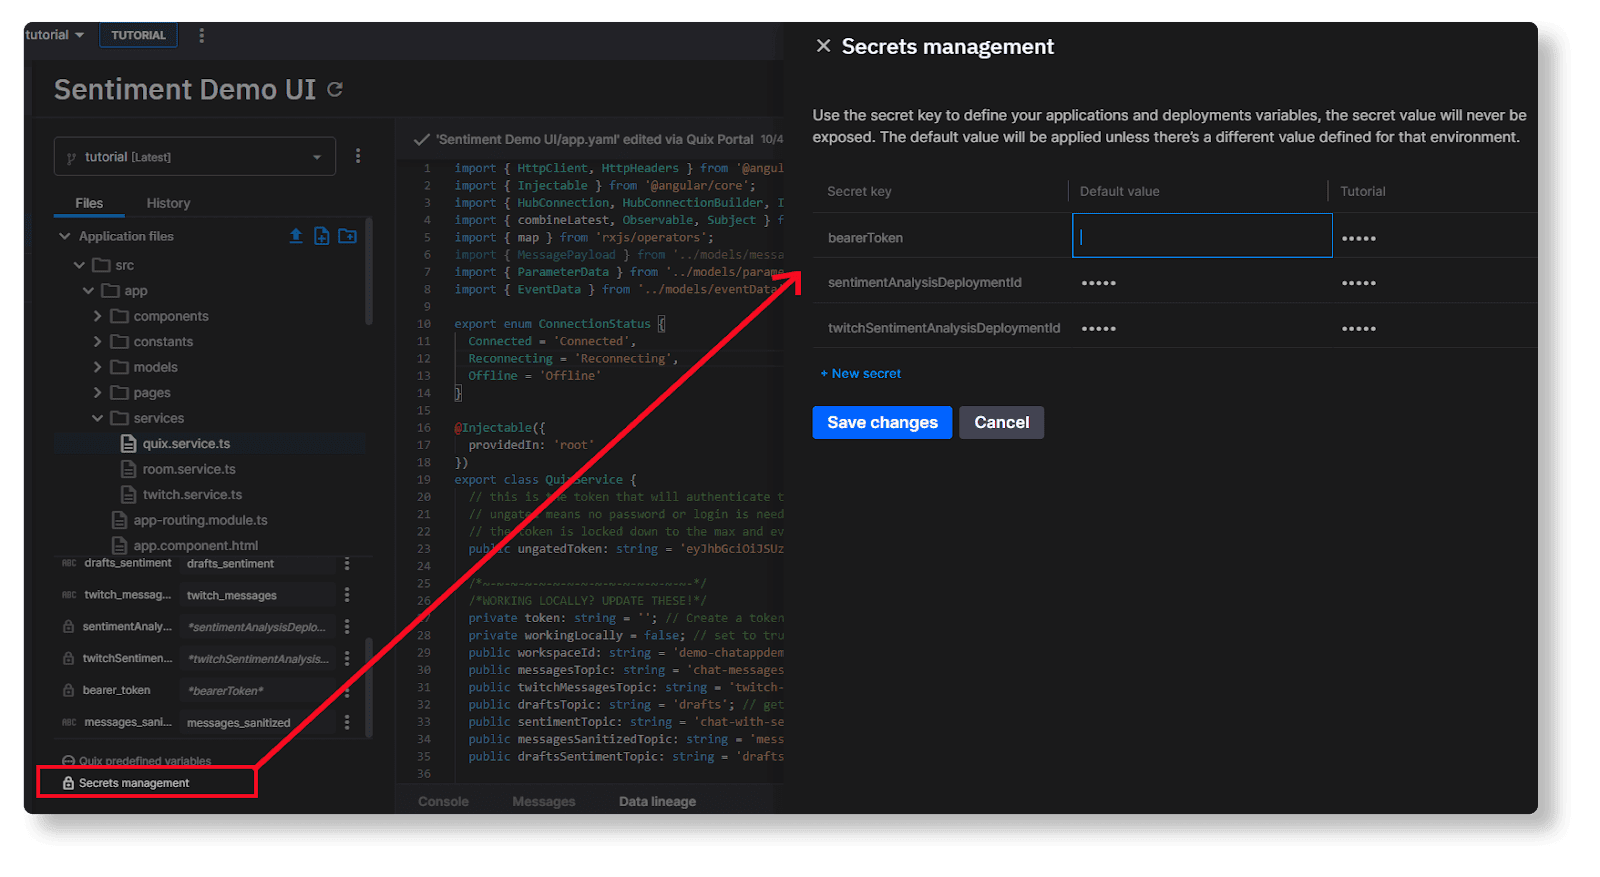
In the Variables section (bottom left), click Secrets management.
In the sidebar that appears, click + New secret, and enter “bearerToken” as the Secret key.
In the “Default” and “Tutorial” columns, paste your Personal Access Token from the previous step as the value in each cell.
Step 2. Adapting the frontend to read from the new topic
Before you start changing the frontend code, you’ll need to add an environment variable that will be accessed via the frontend code to determine the extra topic to read from (the “messages_sanitzed” topic you created in the first part of this tutorial).
Add a new environment variable for the sanitized messages topic
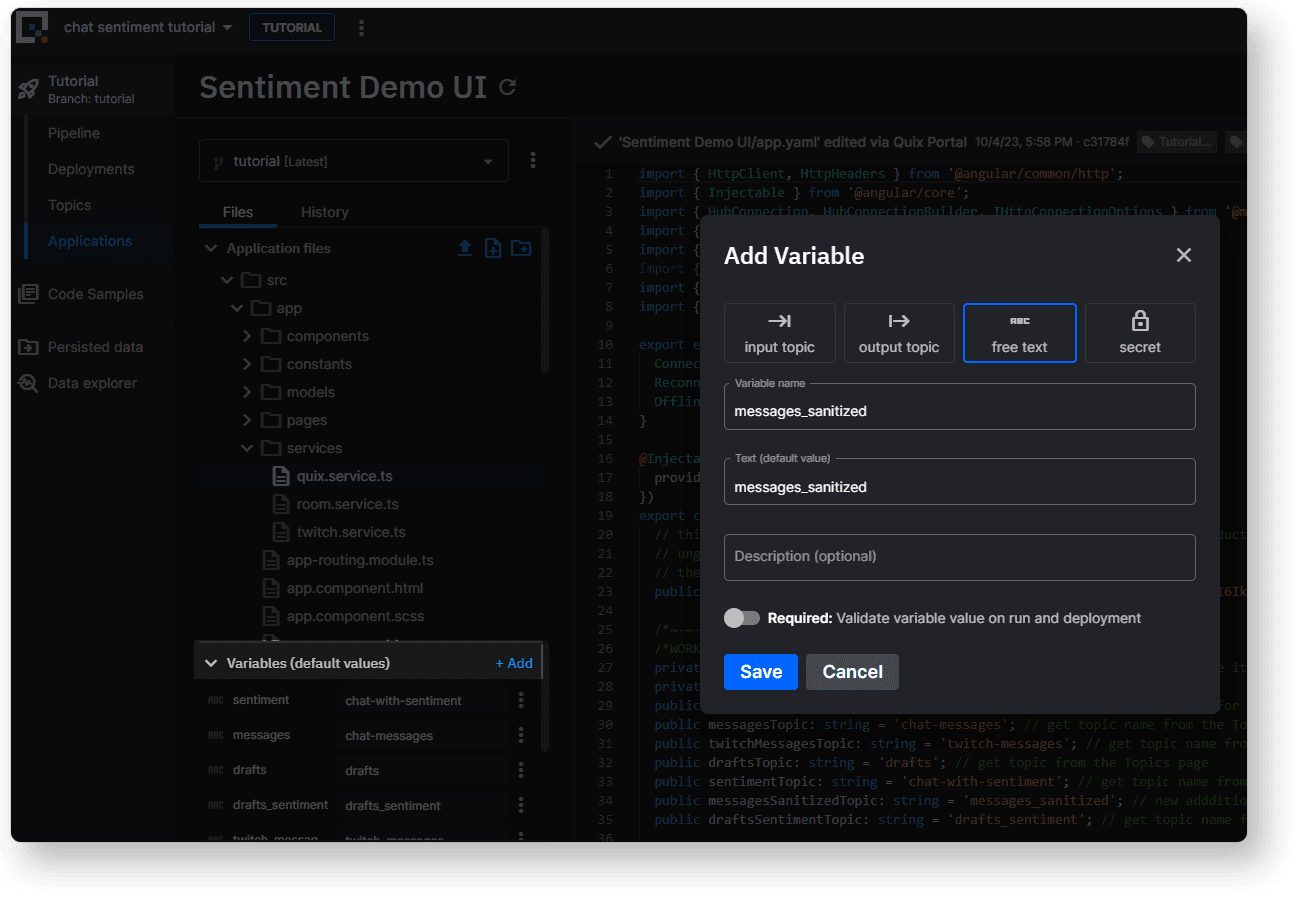
In the Quix Portal, open the Applications page, click Sentiment Demo UI, and in the Variables section, click + Add.
Select free text as the variable type, enter “messages_sanitized” for both the variable name and the value, and save your changes. (This allows you to later change the topic to use without having to update the code again).
Unlike other service types, the topic variable needs to be a free text variable.
Edit the frontend source files
Now comes the main part of the task: updating the frontend end code so that it accesses the new “messages_sanitized” topic variable and renders the censored messages rather than the original messages in the chat history
We’re going to update several source files that form the backbone of the frontend. Again, open the source code for the frontend service in the Quix IDE.
In the Quix portal, open the Applications page, click Sentiment Demo UI and inspect the Application files list. To update the files, follow these steps.
1. Add the new topic environment variable to the init script
Firstly you need to make the new variable accessible to the Angular application at runtime. To do so, open the file ./run_server.sh at the base of the service’s file structure.
Add the following line after the other variables and commit the change.
echo "${messages_sanitized}" > /usr/share/nginx/html/messages_sanitized_topic
The file run_server.sh, is a shell script that sets up the environment for the chat application with sentiment analysis. It writes various environment variables, making their values available to the application at runtime.
To confirm that the changes are correct, see this example of the final version of the file.
Update the Quix connection service
Next, edit the Quix service that manages connections with the SignalR Hub. (There are quite a few changes, so it’s easier if you just replace the code with a file that we have already prepared for the tutorial.)
In the Quix IDE, open ./src/app/services/quix.service.ts and replace it with the code from the tutorial-code repo:
tutorial-code/chat-with-sentiment-exercise/Sentiment Demo UI/quix.service.ts
The file quix.service.ts is an Angular service that manages connections to Quix. It uses SignalR to establish two separate connections, one for reading data (ReaderHub) and one for writing data (WriterHub). The service handles connection setup, reconnection attempts, and subscription to data changes. (Again, here’s a file diff in GitHub to show you what’s changed.)
Update the chat room service
In the Quix IDE, open ./src/app/services/room.service.ts. This file contains the code for another Angular service that manages the chat rooms. It interacts with the Quix service to send and receive messages, and to subscribe or unsubscribe from chat rooms.
Locate the following line:
this.quixService.subscribeToParameter(this.quixService.draftsSentimentTopic, roomName, “*”);
Underneath it, add an equivalent line for the new “messages_sanitized” topic like so:
this.quixService.subscribeToParameter(this.quixService.draftsSentimentTopic, roomName, “*”);
this.quixService.subscribeToParameter(this.quixService.messagesSanitizedTopic, roomName, “*”);
Repeat the process for the unsubscribeFromParameter block (directly after the subscribeToParameter block). The final result should look like this.
this.quixService.unsubscribeFromParameter(this.quixService.draftsSentimentTopic, roomName, “*”);
this.quixService.unsubscribeFromParameter(this.quixService.messagesSanitizedTopic, roomName, “*”);
Here’s the “before and after” file diff.
Update the web chat UI component
In the Quix IDE, open ./src/app/components/web-chat/web-chat.component.ts. This is an Angular component that manages the functionality of a real-time chat interface. It handles user interactions such as sending messages, displaying received messages, and typing indicators.
Locate the following line:
if (topicId === this.quixService.messagesTopic || topicId === this.quixService.twitchMessagesTopic) {
Change the messagesTopic parameter to messagesSanitizedTopic so the update line resembles the following example:
if (topicId === this.quixService.messagesSanitizedTopic || topicId === this.quixService.twitchMessagesTopic) {
Here’s the “before and after” file diff.
Redeploy the frontend service
Once you’ve committed the changes, tag your most recent revision so that it’s easier to tell which version of the code you want the deployment to use.
Tag the commit by clicking the tag icon and give it a name, something like “read-censored-msgs”.
Again, redeploy the service: Open the deployment dropdown on the top right, select Edit existing deployment, then click Redeploy. (Don’t forget to select the tag you just created).
3. Testing your changes
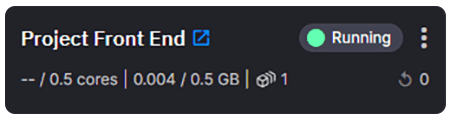
To test it all works, open the chat room again and type a sentence that contains a banned word. To open the UI, click the blue launch icon next to the “Project Front End” service name (on the Pipeline page).
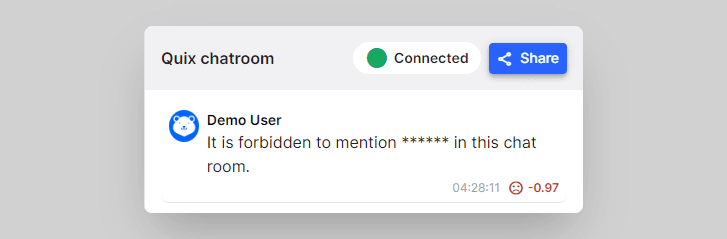
The banned words list contains a few tamer words (like “viagra”), so if you’re stuck for something to write, just enter, “It is forbidden to mention viagra in this chat room.”
When the message comes through in the chat history, you should see a censored version, like this:

And you’re done! You’ve successfully set up an advanced chat app complete with sentiment analysis and a working profanity filter. If you haven’t actually implemented it yet, you can always play with our chat app demo to get a taste of how it works.
What’s next?
If you get stuck or have questions, be sure to join the Quix Community on Slack. You can also find us in the Redpanda Community on Slack and chat with their engineers about Redpanda Cloud or other ways to integrate Redpanda.
Here are some other handy resources you can dig into:
To learn more about how Quix environments are managed, check out the relevant section in the Quix documentation.
For a full guide to this project template, visit the sentiment analysis section in the Quix documentation.
To see another full functional demonstration, why try out our computer vision demo, which uses the YOLO ML model to detect vehicles in London traffic camera feeds.
— Tomas Neubauer, Quix Co-founder and CTO

Let's keep in touch
Subscribe and never miss another blog post, announcement, or community event. We hate spam and will never sell your contact information.


